Understanding Export Options in Autodesk Inventor
Autodesk Inventor offers a variety of export options to suit different needs in manufacturing, design, and collaboration. Common file formats include STEP, IGES, DWF, 3D PDF, DWG, and OBJ. Each format serves a specific purpose depending on the workflow.
- STEP: Widely used for CNC machining and other manufacturing processes because it maintains accurate 3D geometry and product data.
- IGES: Good for sharing complex surface models with other CAD systems.
- DWF: Ideal for web sharing and easy review without requiring CAD software.
- 3D PDF: Perfect for client presentations, allowing interactive 3D views and annotations.
- DWG: Common for 2D drawings, especially in architecture and engineering.
- OBJ: Useful for AR/VR applications and visualization due to lightweight geometry.
Choosing the right export format matters because it affects compatibility, file size, and performance. For example, using STEP files for CNC machining ensures precise toolpaths, while 3D PDFs improve communication with clients by presenting models in an accessible format. Picking the right format helps avoid workflow issues and speeds up project delivery.
Step-by-Step Guide to Exporting Files from Autodesk Inventor
Exporting to STEP Files Ideal for CNC Machining
To export a STEP file from Autodesk Inventor, start by going to File > Export > CAD Formats and choose STEP (stp or step). You’ll be prompted to pick between AP214 or AP203:
- AP214 supports colors and properties, which is great if you need detailed info.
- AP203 creates smaller files, better for basic machining needs.
Before exporting, adjust your settings to match CNC requirements. For example, clean up the model to reduce complexity and make sure all important features are preserved. At HYCNC, we recommend optimizing STEP files by simplifying parts and verifying compatibility to ensure smooth CNC machining.
Exporting to 3D PDF for Client Presentations
To create a 3D PDF, go to File > Export > 3D PDF, or use the Annotate tab > Export panel > 3D PDF. You can customize templates to fit your presentation style and even attach your STEP files or other docs to provide detailed info. For best results, set up the model tree and views carefully in the PDF—this helps clients navigate the design easily using Adobe Acrobat Reader without needing CAD software.
Exporting to DWF for Web Sharing
Exporting DWF files is simple: go to File > Export > DWF. Once exported, upload the DWF file to Autodesk A360. This lets you embed your 3D models in HTML for easy sharing online. DWF is a great choice if you want stakeholders to view your designs without installing any CAD software—they can just open a browser and inspect the model.
Exporting to Other Formats IGES DWG OBJ
Inventor supports exporting to other file types like IGES, DWG, and OBJ depending on your needs:
- IGES is useful for compatibility with older CAD systems or when you need neutral surface data.
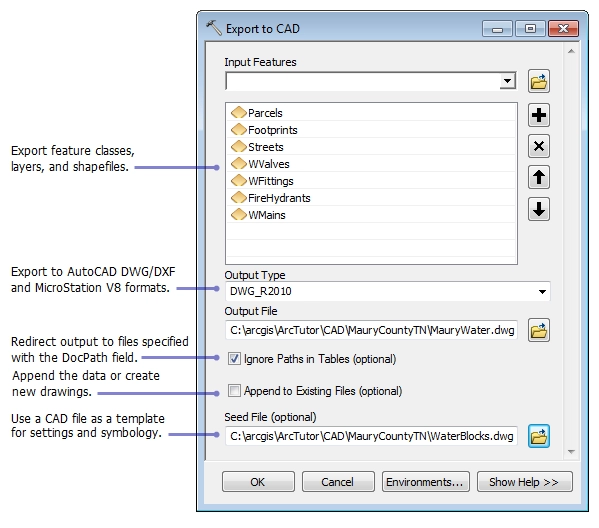
- DWG works well for 2D drawings and AutoCAD users.
- OBJ is popular for AR/VR applications because it maintains 3D geometry and textures.
For these exports, keep an eye on preserving geometry and topology data to avoid problems when opening files in other software. Adjust settings accordingly before exporting for best results.
Optimizing Models Before Export
Before exporting your Autodesk Inventor files, it’s important to simplify your models to improve performance, especially for CNC machining or AR applications. Use the Simplify and Shrinkwrap tools to reduce file complexity by removing unnecessary details like fillets, chamfers, and small parts that don’t affect the overall design. This streamlines your model, making it easier to work with and faster to process.
Also, double-check your model properties and design view representations to ensure everything is set up correctly for export. This includes confirming that all components are visible or hidden as needed and that the file contains only the essential data. Optimizing your model before export helps prevent issues down the line and ensures smoother compatibility with manufacturing or visualization workflows.
Troubleshooting Common Export Issues
When exporting from Autodesk Inventor, you might run into some hiccups. Here’s how to tackle the most common problems:
-
Missing Templates like StandardIAM for STEP imports
If your STEP file import doesn’t show assemblies correctly, check if the StandardIAM template is missing or corrupted. Reinstalling or repairing your Inventor templates often fixes this. Also, make sure you’re selecting the right template during export to keep your assembly structure intact.
-
File Compatibility Issues with Other CAD Software
Not all CAD programs handle exported files the same way. If your STEP, IGES, or DWG files don’t open or look right in other software, try exporting using different format options—like switching between AP203 and AP214 for STEP files. Sometimes, adjusting export settings for simpler geometry or fewer properties helps improve compatibility.
-
Reducing File Size and Triangle Count for AR and VR
AR and VR platforms need lightweight models to run smoothly. Before exporting OBJ or similar formats for these uses:
- Use Inventor’s Simplify and Shrinkwrap tools to strip down complex details
- Remove fillets, chamfers, and tiny parts that aren’t visible in the final view
- Lower triangle counts through mesh reduction tools if available
Smaller files load faster and perform better, which is crucial for AR/VR experiences.
By keeping these tips in mind, you can avoid common export headaches and make your Autodesk Inventor files work well anywhere.
How HYCNC Utilizes Exported Inventor Files
At HYCNC, we rely heavily on clean, well-optimized STEP files exported from Autodesk Inventor for our precision CNC machining projects. STEP files are ideal because they maintain detailed geometry and properties, making it easier for our machines to interpret complex designs accurately.
Using optimized files means smoother workflows, fewer errors, and faster turnaround times. When your Inventor files are simplified—free of unnecessary details and ready for machining—it helps us deliver high-quality parts with tight tolerances.
If you want hassle-free CNC service using your Inventor models, contact HYCNC. We specialize in turning your exported CAD files into precise, ready-to-manufacture components. Let us help you maximize your design’s potential with expert CNC machining tailored to your needs.
Additional Tips and Best Practices
Before you start exporting files from Autodesk Inventor, it’s smart to back up your settings. This keeps your Application Options and customizations safe in case you need to reset or move your setup to another computer.
If you want to save time, consider using the Inventor API or iLogic to automate your export workflows. These tools let you create scripts that handle repetitive export tasks without manual input, which is a real time-saver.
For teams or businesses, Autodesk Vault is a game changer. It helps with version control and secure file sharing, so everyone stays on the same page and your Inventor file exports are tracked properly. This way, you avoid confusion and data loss when working with clients or across departments.


