Understanding DXF Files and Laser Cutting Requirements
If you’re wondering how to export a DXF from Inkscape for laser cutting, it helps to start with the basics. A DXF file is a popular vector format used to store 2D and 3D designs. Laser cutters rely on these files because they contain precise path information the machines need to cut or engrave your design accurately.
For laser cutting, the DXF file must meet certain requirements to avoid problems during cutting. Here’s what you need to keep in mind:
- Closed paths only: Your design’s shapes must be fully closed so the laser knows exactly where to start and stop cutting.
- No overlapping shapes: Overlapping lines or shapes can confuse the laser cutter, leading to double cuts or wasted material.
- Correct units: Use millimeters or inches consistently in your design. Inkscape’s Document Properties can help set this correctly.
- Clean geometry: Make sure paths are smooth and free of stray nodes or overlaps that could cause jagged cuts or errors.
Common issues often come down to open contours and stray nodes. Open contours are paths that aren’t fully connected, which leaves gaps the laser can’t handle well. Stray nodes are extra points on your paths that create uneven edges when cutting. Fixing these before exporting your DXF can save you a lot of headaches down the line.
Let’s dive into how to prepare your Inkscape file perfectly for laser cutting and export a clean DXF file ready for your laser cutter.
Step by Step Guide to Exporting a DXF from Inkscape
Step 1 Set Up Your Inkscape Document
Start by opening Inkscape and setting your document’s units to match your laser cutter’s requirements—usually millimeters or inches. Go to File > Document Properties and choose your preferred unit. This ensures your design will be the right size when cut. Also, set the page size to fit your material or laser bed dimensions.
Step 2 Create or Import Your Design
Now, create your vector design from scratch using Inkscape’s tools or import an existing SVG or other vector file. Make sure your design is purely vector paths since DXF files don’t support raster images. If you’re importing, double-check that all elements are paths and not embedded images.
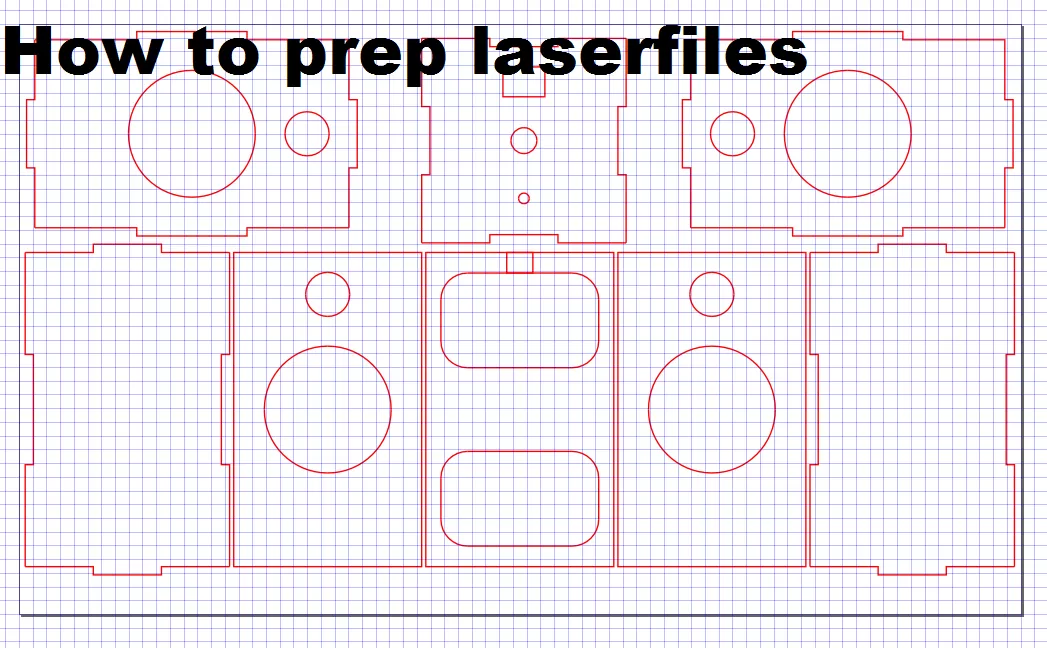
Step 3 Prepare Your Design for Laser Cutting
This is key for clean cuts. Check your paths:
- Make sure all paths are closed without any gaps.
- Avoid overlapping shapes where you don’t want double cuts.
- Simplify your paths to get rid of unnecessary nodes that could mess up the laser path.
- Convert all text to paths by selecting the text and choosing Path > Object to Path.
Doing this prevents issues like open contours or uneven cuts.
Step 4 Export the DXF File
Once your design is ready, go to File > Save As, then choose Desktop Cutting Plotter (AutoCAD DXF R14) from the file type dropdown. In the export options, select “Use LWPOLYLINE type of output” for better compatibility with laser cutter software. Save your file and make sure it exports without errors.
Step 5 Verify Your DXF File
Before sending your file to the laser cutter, open it in a CAD viewer or your laser software to confirm:
- Paths are all closed and clean.
- The scale matches your original Inkscape document.
- No stray nodes or unexpected elements show up.
This quick check will save time and materials by catching errors early.
Troubleshooting Common DXF Export Issues
When exporting a DXF from Inkscape for laser cutting, a few common problems can cause headaches. Here’s how to spot and fix them quickly.
Open Contours
Open or disconnected paths can cause your laser cutter to hesitate or cut in the wrong places. To find them:
- Switch to Outline mode in Inkscape (View > Display Mode > Outline).
- Look for any shapes that don’t fully close or have gaps.
- Fix these by selecting the nodes and joining them (Edit Path by Nodes tool, then select endpoints and click “Join Selected Nodes”).
Extra Nodes
Too many nodes make cuts uneven or messy—your laser head will try to follow every tiny bump, causing ragged edges. To clean up:
- Use the Simplify Path option (Path > Simplify) to reduce unnecessary points.
- Manually delete stray nodes that don’t affect your shape.
Scaling Issues
Laser cutters need the design to be the correct size, so scaling is crucial. Check:
- Your Document Properties (File > Document Properties), especially the units (set to inches or mm).
- Make sure your design is drawn and exported at a 1:1 scale to avoid distortion on the machine.
Text Problems
Text often causes issues because laser cutters only cut paths, not fonts. Fix this by:
- Converting text to paths (Path > Object to Path).
- Using stencil fonts if your design has cutout letters, which prevent inner parts from falling out.
Fixing these common DXF troubles ensures a smooth laser cutting process and saves time on the shop floor.
Tips for Optimizing Your Laser Cutting Workflow with HYCNC
To get the best results, always double-check that your DXF file is compatible with your laser cutter software before sending it off. HYCNC offers a handy preflight checklist that helps catch common issues early, so you can avoid errors during cutting.
Once your file is ready, upload your DXF directly to the HYCNC platform. They provide instant quotes and deliver precision laser cutting services tailored to your needs. This makes the whole process smooth, fast, and reliable.
For quick project setups, consider using helpful Inkscape extensions like Tabbed Box Maker. It speeds up creating designs like boxes or enclosures, saving you time on repetitive tasks.
Following these tips ensures a clean workflow from your Inkscape DXF export to a flawless laser cut with HYCNC’s trusted services.